
Remove Glare From Photo Online Free: Glasses and Reflection Fixes
Remove Glare
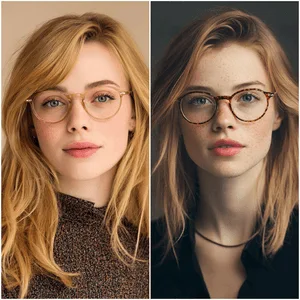
Remove glare and reflections from eyeglass lenses while preserving the face, eyes, frames, and natural lighting.
View tool details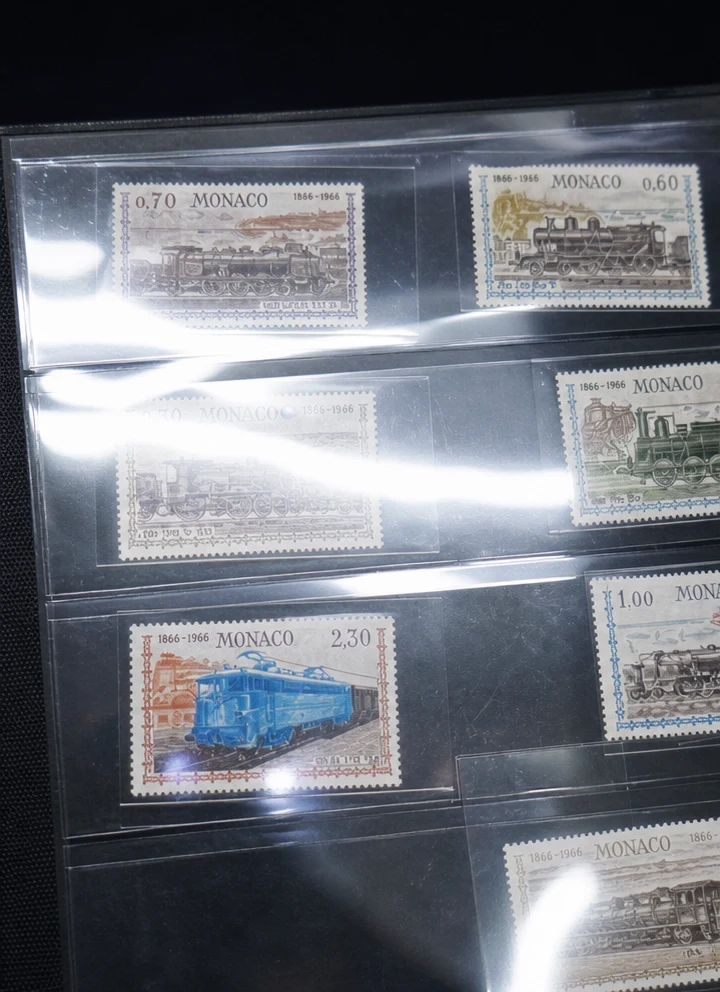
Direct answer
To remove glare from a photo online, identify whether the problem is eyeglass lens glare, glass reflection, glossy product glare, flash hotspot, or shadow. Use the smallest targeted AI edit for that surface, then review the face, product, room, or document details before exporting.
To remove glare from a photo online, first identify what kind of glare is blocking the image: eyeglass lens glare, flash reflection, window reflection, glossy product glare, or a hard shadow. Then use the smallest targeted edit that matches the problem. Eyeglass glare and glass reflection look similar, but they need different cleanup instructions.

The best result is not always a perfectly invisible edit. A good glare cleanup makes the real subject easier to see while keeping the face, product, room, or document believable.
Key takeaways
- Use a glare remover for bright streaks, flash hotspots, or eyeglass lens reflections.
- Use reflection removal for windows, plastic sleeves, glass cases, glossy packaging, and display surfaces.
- If the glare fully hides important details, AI has less evidence to reconstruct; try a better source photo if possible.
- Edit one glare area at a time instead of selecting half the image.
- For profile photos, keep the glasses frame, eyes, skin texture, and lighting direction unchanged.
What "remove glare from photo" really means
Glare removal means reducing a bright reflection or hotspot so the original subject is easier to see. It is different from changing exposure on the whole photo. The editor has to rebuild a local area while preserving edges, texture, color, and lighting.
Common glare problems include:
| Glare type | Typical photo | Best first tool |
|---|---|---|
| Eyeglass lens glare | Portraits, selfies, headshots, team photos | Remove Glare |
| Glass or window reflection | Storefronts, rooms, travel photos, display cases | Remove Reflection |
| Flash hotspot | Collectibles, documents, product photos | Remove Reflection |
| Glossy packaging glare | Ecommerce, resale, product listing images | Remove Reflection |
| Harsh cast shadow | Indoor photos, table shots, object photos | Remove Shadow |
The important decision is whether the glare sits on a person wearing glasses or on a reflective surface. Treat those as separate jobs.
Remove Glare vs Remove Reflection
Use Remove Glare when the problem is on eyeglass lenses. The goal is to reduce white streaks, flash reflections, and screen reflections while keeping the face, eyes, frames, and lens edges natural.
Use Remove Reflection when the glare comes from glass, plastic, a window, glossy product packaging, a display case, or a protective sleeve. The goal is to make the object behind the reflective surface easier to see without changing what the object is.
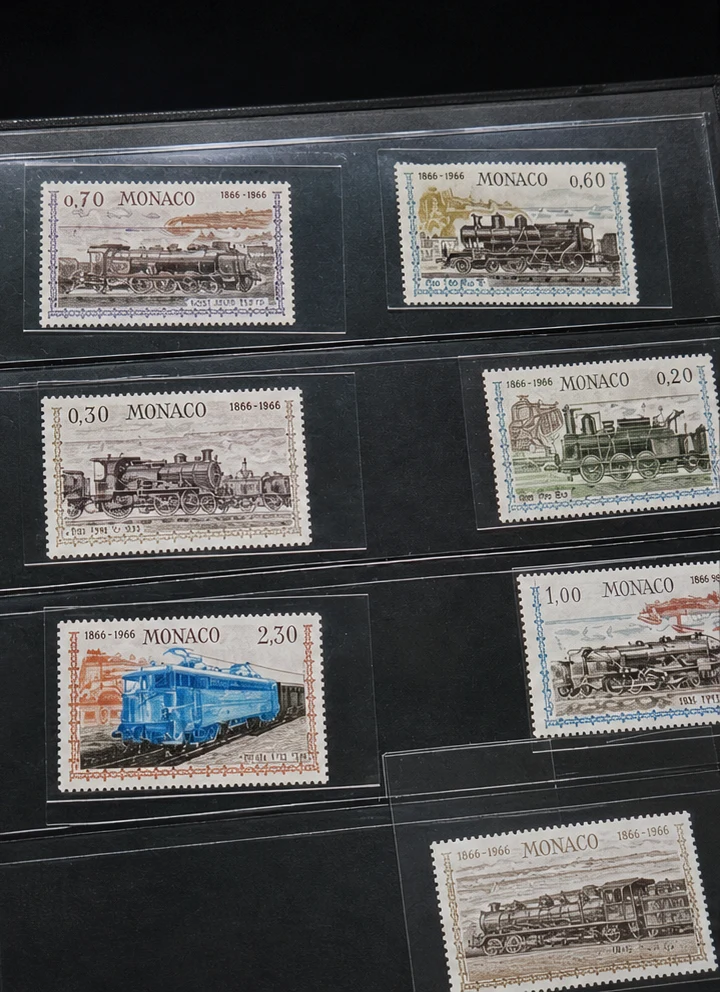
If your photo has both problems, start with the part that matters most. For example, clean eyeglass glare before trying general portrait retouching. Clean product glare before removing dust or small background clutter.
How to remove glare from glasses online
For portraits, use a conservative workflow:
- Upload the original photo, not a compressed screenshot.
- Choose a glare-specific preset instead of a full glasses removal preset.
- Keep the whole face and glasses frame visible.
- Target the glare on the lenses, not the entire face.
- Review the eyes, eyelashes, frame shape, and skin texture at full size.
- Run another smaller pass only if one glare area still distracts.
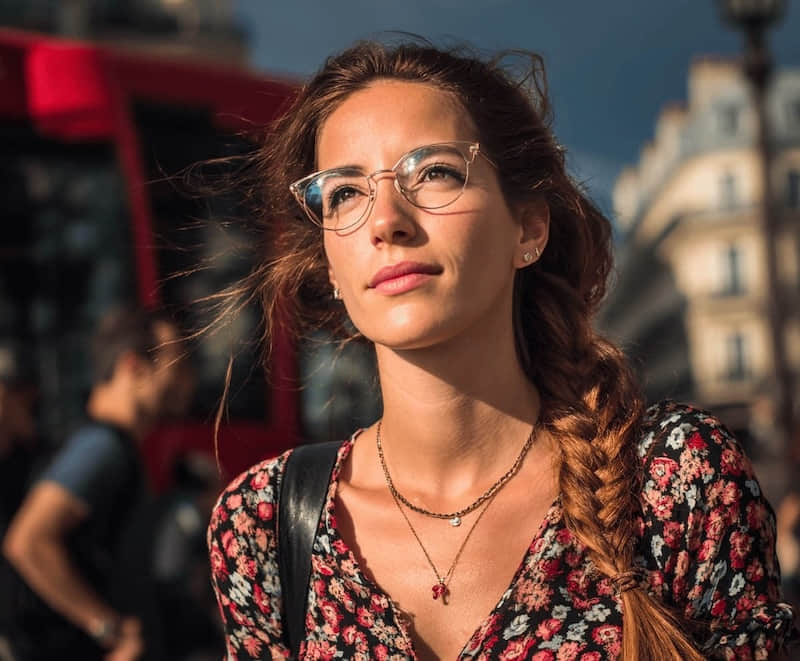
The common mistake is asking the AI to remove the glasses when you only want to remove the glare. Those are different tasks. If you want to keep the glasses, the prompt should say that the frame and lens edges must remain.
How to remove glass or window reflection
For glass, plastic, windows, and glossy surfaces, start by asking what the viewer needs to see. A product photo may need the label to be clearer. A room photo may need a window reflection reduced. A collectible photo may need flash glare removed from a sleeve.
Use this workflow:
- Crop or zoom only enough to see the reflected area clearly.
- Select the reflection or hotspot, leaving nearby real details visible.
- Avoid selecting the whole object unless the reflection covers the whole object.
- Generate once and compare edges, text, and texture.
- If printed text or artwork looks invented, undo and use a smaller edit.
For ecommerce, resale, real estate, or documentation-style photos, keep edits honest. Reducing a distracting reflection is reasonable. Hiding damage, changing a product label, or altering material facts is not.
When AI glare removal may fail
AI cleanup needs visual evidence. It works best when the true subject is partly visible under the glare. It is harder when:
- A white flash hotspot fully covers an eye, label, face, or printed detail.
- The reflection crosses tiny text, jewelry, eyelashes, or repeated patterns.
- The photo is low resolution or heavily compressed.
- The reflective surface changes the color of the subject underneath.
- The edit affects an important commercial or identity decision.
In those cases, try a better source photo first: change the shooting angle, turn off flash, move away from a window, or take a second image with less reflection.
Where ClearCrowds fits
ClearCrowds has separate cleanup paths for glare and reflection problems:
- Remove Glare for eyeglass glare, lens reflection, flash hotspots, and white streaks on portraits.
- Remove Reflection for windows, plastic sleeves, glossy packaging, display glass, and product reflections.
- Remove Shadow when the issue is a dark cast shadow rather than a bright reflection.
- Remove Glasses when the goal is to remove the glasses entirely, not just the glare.
Start with the closest preset, check the result at full size, and then use a smaller second pass if needed.
Quick decision checklist
| Question | If yes | Use |
|---|---|---|
| Is the glare on eyeglass lenses? | Keep the person and frames intact | Remove Glare |
| Is the reflection on glass, plastic, or packaging? | Preserve the subject behind the surface | Remove Reflection |
| Is the issue a dark area, not a bright reflection? | Lift or reduce a cast shadow | Remove Shadow |
| Do you want the glasses gone entirely? | Reconstruct the face without frames | Remove Glasses |
Frequently Asked Questions
Can I remove glare from glasses for free?
You can start with an online glare-removal workflow and test whether the result looks natural before committing to a final export. Always check the current tool limits, because free previews, downloads, and export quality can vary by product and account status.
Is glare removal the same as removing reflections?
Not always. Eyeglass glare is a portrait problem. Window, plastic, glass, and packaging reflections are broader object or surface problems. ClearCrowds separates these into Remove Glare and Remove Reflection so the edit instructions are more precise.
Can AI recover details hidden by a white flash?
Sometimes, but not always. If the original detail is partly visible, AI has more evidence. If the flash completely covers an eye, label, or artwork, the result may look guessed. A better source photo is usually safer.
Will glare removal change the face?
It should not. A good eyeglass glare edit preserves face shape, eye color, skin texture, frame shape, and natural lighting. If those details change, redo the edit with a smaller target area or use a more specific prompt.