
How to Take Professional Headshots at Home (Phone Setup + AI Finish)

Finish your professional portrait
Upload your clearest home portrait, choose a work-ready style, and export the crop you need. Compare the face with your original before using it.
Check the setup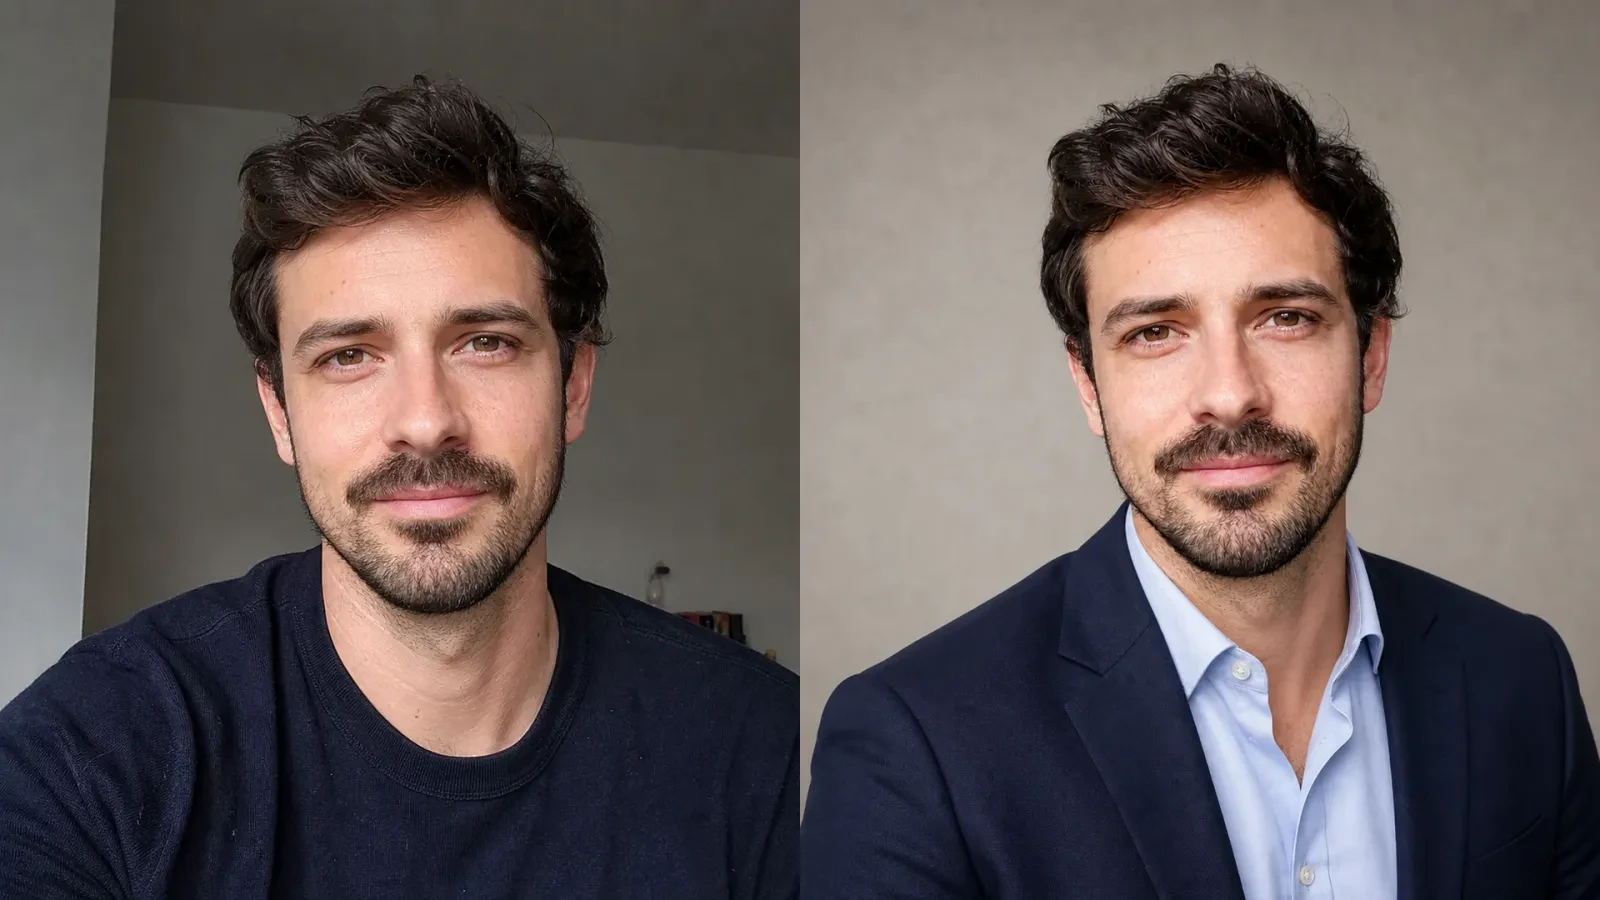
Direct answer
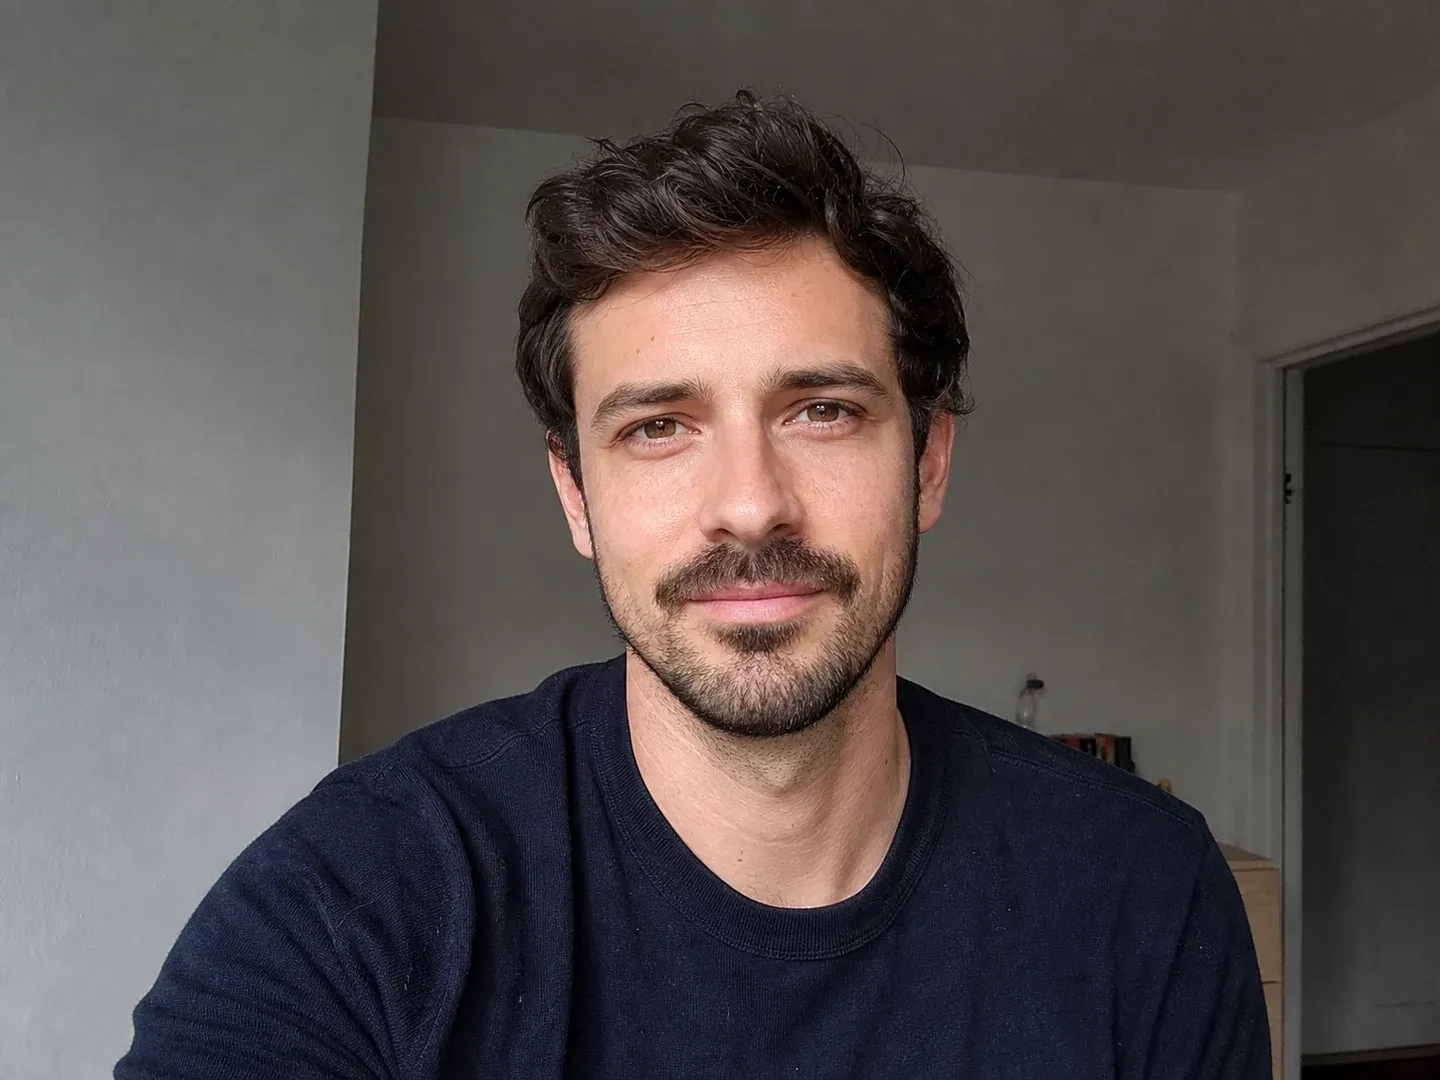
Face a broad window, put your phone at eye level several feet away, and use a plain background. Frame the photo from about mid-chest up, leave space around your head and shoulders, then take a series of shots with a relaxed expression. Pick the sharpest photo that still looks unmistakably like you before you edit anything.
That setup matters more than buying another camera. If the chosen photo still feels too casual, a restrained portrait edit can tidy the background, clothing, light, and final crop. Compare the edited face with the original before you use it. Export a square image for LinkedIn, a 3:4 image for many staff badges, or a 4:5 image for a resume or team page. Check the destination's own requirements before submitting the file.
Finish your professional portrait
- Seven work-ready styl…
- LinkedIn, badge, team…
- Original-first review
Upload your clearest home portrait, choose a work-ready style, and export the crop you need. Compare the face with your original before using it.
Key takeaways
- Window light, camera height, background, and distance do more for a home headshot than a strong filter.
- Pick a sharp, recognizable source photo before changing clothing, background, or light.
- A square crop works well as a LinkedIn starting point. Staff badges and team pages often need a vertical crop.
- Compare facial details with the original after any generated edit.
- Hire a photographer when you need active direction, team consistency, or strict technical compliance.
Table of contents
- What a professional headshot needs to do
- Home setup
- Capture workflow
- Why the export step matters
- When a portrait edit helps
- Output sizes
- Review checklist
- FAQ
What a professional headshot needs to do
A work headshot has a modest job: help someone recognize you quickly. It should look current, keep your face easy to see, and fit the surface where it will appear. A dramatic pose or heavily retouched face works against that job.
LinkedIn says a profile photo must reflect the member's likeness. Its upload guidance accepts JPG or PNG files from 400 x 400 through 7680 x 4320 pixels, up to 8 MB. Those are platform limits, not a promise that every shape will look good in a profile circle. A centered square remains a practical starting point because it gives the interface room to apply its circular display crop. Official profile photo upload requirements and Official profile photo policy provide the current limits and likeness rule.
A solid headshot usually has:
- a recognizable face with natural skin texture and age cues;
- even light across the eyes, without a bright window behind the subject;
- a background that does not compete with the face;
- enough room to make more than one crop without cutting into the head or shoulders;
- clothing that makes sense for the role and still feels like something the person would wear.
The last point is easy to overthink. "Professional" does not mean one uniform. A developer, realtor, university applicant, and creative director may need different clothing, but all four photos still need to look credible.
Home setup
Use a window as the main light
Stand facing a large window or turn your body slightly toward it. Avoid direct midday sun on the face. VCU Career Services recommends an indoor location away from direct sunlight, a simple backdrop, and a face turned toward the light source. VCU home headshot guide
Turn off a nearby ceiling light if it gives one side of the face an orange or green cast. If the window is behind you, move the setup so the face is lit from the front or side.
Put the phone at eye level
Use a tripod, shelf, stack of books, or another stable support. The lens should sit close to eye height rather than looking up from a desk or down from above your forehead. UC Davis advises an eye-level camera, a well-lit face, and a plain background for professional video and interview presentation. The same setup is useful for a still headshot. UC Davis Career Center
Move the phone several feet away instead of holding it at arm's length. That distance gives you room to frame the shoulders and make a clean crop later.
Leave space between you and the wall
Do not press your back against the background. Step forward if the room allows it. The gap helps the wall fall slightly out of focus and reduces hard shadows behind your head.
A plain wall, curtain, or uncluttered room can all work. Pick a background that contrasts with your clothes. The University of Kansas recommends solid clothing colors and enough contrast from the background so the subject does not blend into it. University of Kansas Career Center
Prepare the phone
Clean the camera lens. Use the rear camera when you can see the composition through a helper, mirrored display, remote shutter, or timer. If that makes the process awkward, use the front camera and concentrate on stable framing and good light.
On a supported iPhone, Portrait mode can keep the subject sharp while softening the background. Apple also lets you adjust portrait lighting and depth on supported devices. Keep the effect subtle enough that hair and glasses still have clean edges. Apple iPhone User Guide
Capture workflow
- Choose the final use first. A LinkedIn photo, employee badge, and team page do not always use the same shape.
- Place the phone at eye height and frame from roughly mid-chest up. The University of New Hampshire's DIY headshot booth guidance uses mid-chest framing, a backdrop, lighting, and a tripod as its practical setup. UNH Career and Professional Success
- Turn your body a little, then bring your eyes back toward the lens. Keep your shoulders relaxed.
- Take several photos. Try a neutral expression and a small, natural smile instead of forcing one expression across every frame.
- Check focus at full size. Look closely at the eyes, eyelashes, hairline, and glasses.
- Pick one source photo before editing. Do not try to rescue a frame where the face is motion-blurred or mostly hidden.
Ohio State's engineering career service also treats a phone as a workable device for a DIY professional headshot. It is still worth using the best source image you can make because editing cannot recover details the camera never captured. Ohio State Engineering Career Services

Evidence and reasoning
The career-center sources above explain the capture setup well. LinkedIn documents its upload limits and likeness rule. What neither source set resolves is the handoff between a usable source photo and a file prepared for a particular work surface. This guide handles that handoff with three decisions:
- Decide whether the original already looks credible enough.
- If you edit it, compare the person's identity and small details with the source.
- Export for the actual destination instead of using one arbitrary crop everywhere.
The pair below comes from the same generated source and shows the intended difference between a casual home input and a restrained professional finish. It is an editorial illustration, not a promise that every photo will produce the same result. The source and edit provenance are recorded in the project asset manifest.

Product fit and limitations
ClearCrowds publishes this guide and makes the optional Portrait Professional workflow described here.
If you want to compare work-ready styles before uploading, see the AI professional headshot examples. The feature page covers LinkedIn, resume, employee badge, and company profile outputs; this guide remains focused on taking a stronger source photo at home.
Use it after you have chosen a sharp source photo. Open Portrait, choose Professional, then select a visual direction:
- Natural keeps the result closest to a simple daylight portrait.
- Corporate uses conservative office-ready clothing and a neutral studio-like background.
- Executive uses more formal tailoring and restrained lighting.
- Creative allows a more relaxed professional look without turning the image into a fashion shoot.
- Healthcare uses calm light and a cool neutral background without inventing credentials or logos.
- Academic uses understated styling and a muted slate-blue background.
- Client-facing uses brighter, warmer light for consulting, hospitality, and real-estate profiles.
You also choose a pose and the final destination size. The current workflow offers a centered square for LinkedIn, a 3:4 staff-badge option, a 4:5 resume or team-page option, and Custom to keep the generated aspect ratio for later cropping. The ClearCrowds editor is the first-party source for those product choices.
AI edits are generated, so details can change. Review the face shape, eyes, age cues, expression, hairline, skin tone, skin texture, glasses, clothing edges, and shoulders against the original. Do not use a result that looks like a different person or invents a uniform, badge, logo, or credential.
A photographer remains the better choice when you need direction during the shoot, consistent lighting across a full team, press or acting portraits, or a tightly standardized official photo. Portrait Professional is not an ID-document compliance tool.
Output sizes
Choose the output based on where the headshot will appear. There is no single universal professional-headshot size.
| ClearCrowds option | Output | Good starting point for | Check before use |
|---|---|---|---|
| 1024 x 1024, 1:1 | LinkedIn and other square profile surfaces | Preview the circular crop and keep the face centered | |
| Staff badge | 900 x 1200, 3:4 | Employee badge or directory systems that use a vertical portrait | Confirm the employer's exact dimensions and background rule |
| Resume or team page | 1200 x 1500, 4:5 | Resume, speaker page, staff bio, or company team page | Confirm local resume-photo norms and the site's crop behavior |
| Custom | Generated aspect ratio | A later crop or destination not listed above | Finish the exact crop in the editor before use |

LinkedIn's minimum and maximum upload dimensions are broader than the 1024 x 1024 option above. The ClearCrowds size is a practical centered export, not an official LinkedIn requirement. For a company badge, use the exact specification from the employer when one is available.
If you need another social ratio, read the full-picture crop and resize guide. For nearby portrait cleanup, use Remove Glasses, the eyeglass glare workflow, or the teeth whitening photo editor only when that specific issue is present. The broader ID photo editor is for document-style background and size tasks, not a substitute for checking official photo rules.
Review checklist
Compare the source and result side by side at full size and at the final profile size.
- Does the face still look like the same person?
- Are the eyes, eyebrows, nose, mouth, jaw, ears, and age cues stable?
- Is the expression unchanged?
- Does the hairline meet the background cleanly?
- Does the skin still have believable texture and color?
- Are glasses, earrings, and clothing edges intact?
- Are both shoulders present without a strange cut or repeated texture?
- Is there enough headroom after the final crop?
- Does the background contain warped lines, text, logos, or invented objects?
- Does the destination preview crop the face or shoulders differently?
- Is the file format and size accepted by the destination?
If any important facial detail looks uncertain, use the original or take another photo. A recognizable, ordinary image is better than a polished image that does not look like you.
FAQ
Can I take a professional headshot with my phone?
Yes. A recent phone is a workable capture device when you use soft front light, a stable eye-level position, a quiet background, and enough distance for a natural head-and-shoulders frame. The setup and source photo matter more than adding a strong filter later.
Should I use the front or rear camera?
Use the rear camera when you can frame it confidently with a helper, timer, remote shutter, or mirrored preview. Use the front camera when it makes the session easier. Good light, steady framing, and sharp eyes matter more than struggling with a camera you cannot position well.
What is the best background for a professional headshot?
A plain wall, curtain, or tidy room with little visual competition works well. Leave some distance between yourself and the background. Choose a color that separates your hair and clothing from the wall.
What should I wear?
Wear a solid or low-pattern outfit that fits the role and contrasts with the background. Avoid clothing you would never wear in the context where the photo will appear. Take one test frame to check wrinkles, collars, jewelry, glare, and color cast.
What size should a LinkedIn headshot be?
LinkedIn accepts JPG or PNG profile photos from 400 x 400 through 7680 x 4320 pixels and up to 8 MB. A centered 1024 x 1024 square is a practical export because it leaves room for the circular profile display, but it is not an official required size.
Can AI change my clothes or background without changing my face?
It can attempt a focused edit, but generated details can still change. Compare the result with the original, especially around the eyes, face shape, expression, hairline, skin, glasses, and shoulders. Reject the result if identity has drifted.
When should I hire a photographer instead?
Hire a photographer when the image is high stakes, you want active posing and expression direction, a full team needs consistent lighting, or the destination has strict technical requirements. A home photo works best when convenience matters and you can inspect the result carefully.
References
- Official help: Add or change the background photo or profile photo
- Official help: Profile photo guidelines and conditions
- Apple iPhone User Guide: Take portraits
- Ohio State Engineering Career Services: Taking your own professional headshot
- UNH Career and Professional Success: DIY professional headshot photo booth
- VCU Career Services: Creating a professional headshot from home
- UC Davis Career Center: What to wear
- University of Kansas Career Center: Professional headshots