
How to Remove Red Eye in Photos Without Changing the Eyes
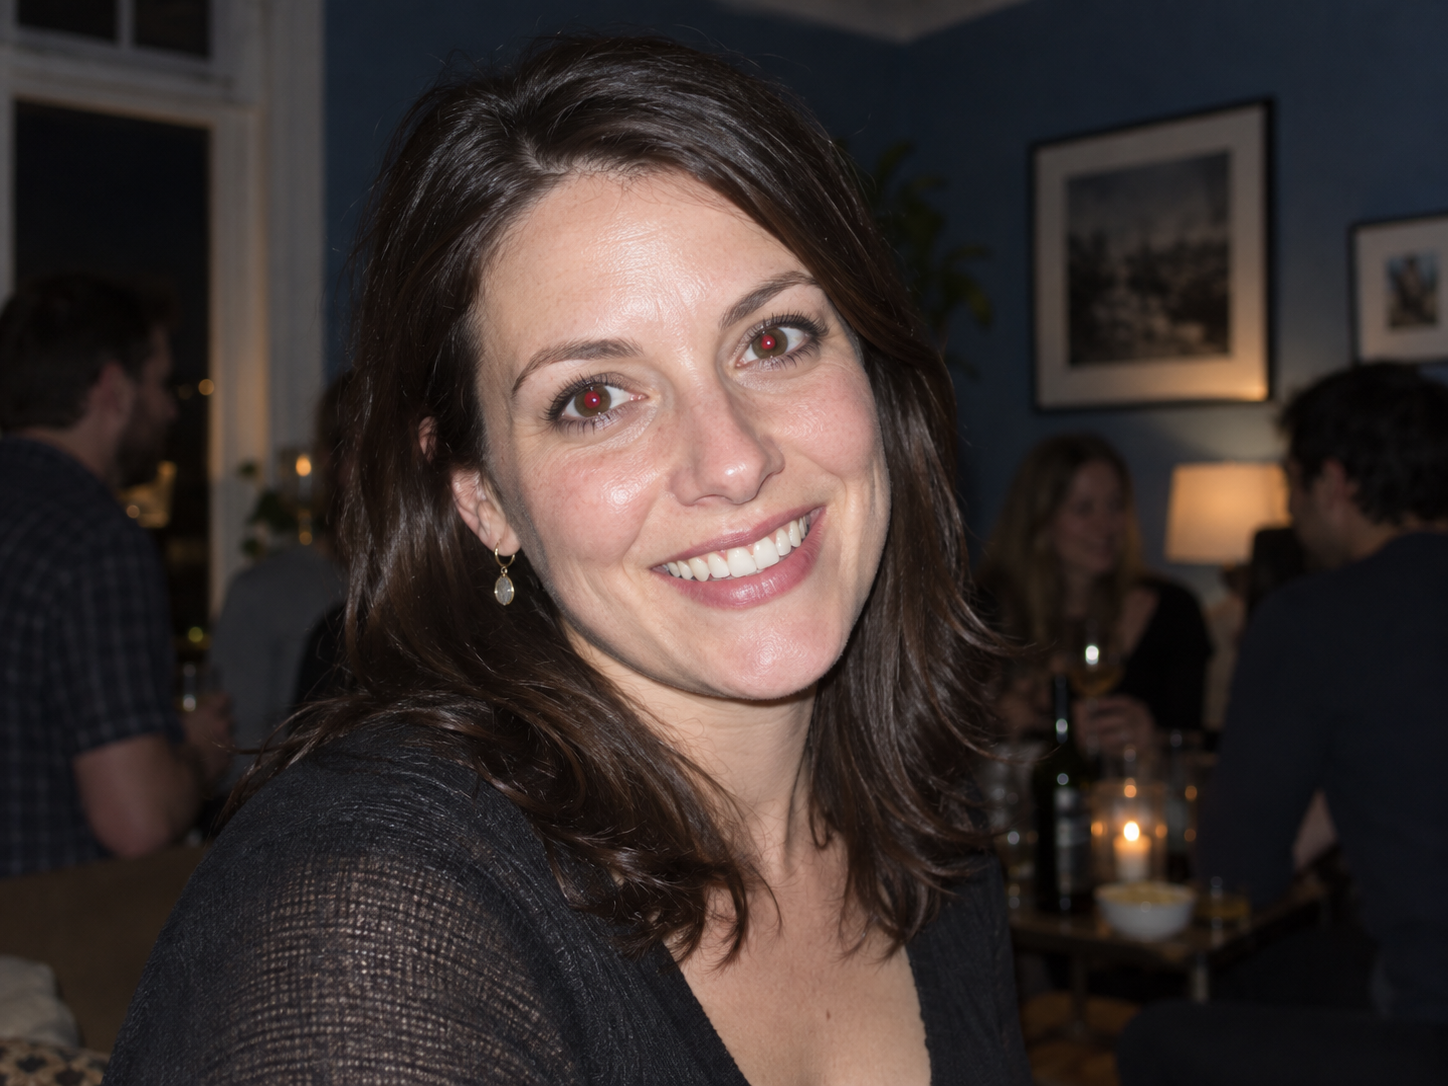
To remove red eye in photos, use a dedicated red-eye correction on the affected pupils, then compare the result with the original at normal viewing size. Correct the reflection—not the whole iris, the whites of the eyes or the surrounding skin. Start with a duplicate so you can undo a correction that looks unnatural.
Key takeaways
- Work on each pupil separately, especially in group photos.
- Keep small white catchlights; solid black circles usually look painted on.
- Avoid changing every red pixel in the photo: lips, clothes and skin can be affected too.
- If the original pupil has almost no visible detail, a darkened patch is not recovered detail.
What counts as red-eye correction?
In this guide, red-eye correction means reducing an unwanted red flash reflection inside a pupil while preserving eye shape, iris color and expression. It is not changing someone’s eye color or enlarging their eyes. Apple’s Photos guide describes red pupils as a possible result of flash photography. Apple: remove red-eye from photos.

AI-generated source illustration. This is not a customer photograph or a screenshot of a ClearCrowds tool.
How to remove red eye in photos on a Mac
In Photos, open the image for editing, select Adjust, then Red-Eye. Try Auto first. If a pupil still needs attention, resize the correction circle to the red area and click it. Repeat for the other affected pupils. These controls follow Apple’s Photos instructions.
Then perform your own visual check:
- Zoom in enough to distinguish the pupil from the iris.
- Toggle the correction off and on. The iris outline should not move.
- Look for a dark halo outside the pupil or a gray patch over the iris.
- Return to normal viewing size. Both eyes should belong naturally in the same photo.
- Save a copy only after checking every face, not just the largest one.
If your phone or editor does not show a red-eye control, do not assume a general enhancement button performs the same targeted correction. Check that application’s current help, or move a copy to an editor with a dedicated control.
Choose a method that matches the photo
| Situation | Start with | Check before saving |
|---|---|---|
| Clearly visible red pupils in a flash portrait | Dedicated red-eye tool | Pupil edges and catchlights |
| One pupil corrected but the other still red | Manual correction for the remaining pupil | Similar darkness under the original lighting |
| Small faces in a group shot | Separate, small corrections | No paint over eyelids or glasses |
| Green or yellow reflections in a pet’s eyes | A tool that specifically supports pet-eye correction | Do not assume human red-eye detection applies |
| Blurry, tiny or overexposed eyes | Preserve the original and use a better source if available | Do not present invented eye detail as restoration |
Apple specifically notes that its red-eye tool does not handle green or yellow flash reflections in animal eyes. Apple’s tool limitations.
Why the corrected eyes can look wrong
An oversized correction covers more than the reflection. Undo it and try a smaller target. If the pupils become flat black discs, reduce the correction or retain more of the original highlight. Check against the unedited photograph rather than making both eyes mechanically identical: their reflections may differ naturally.
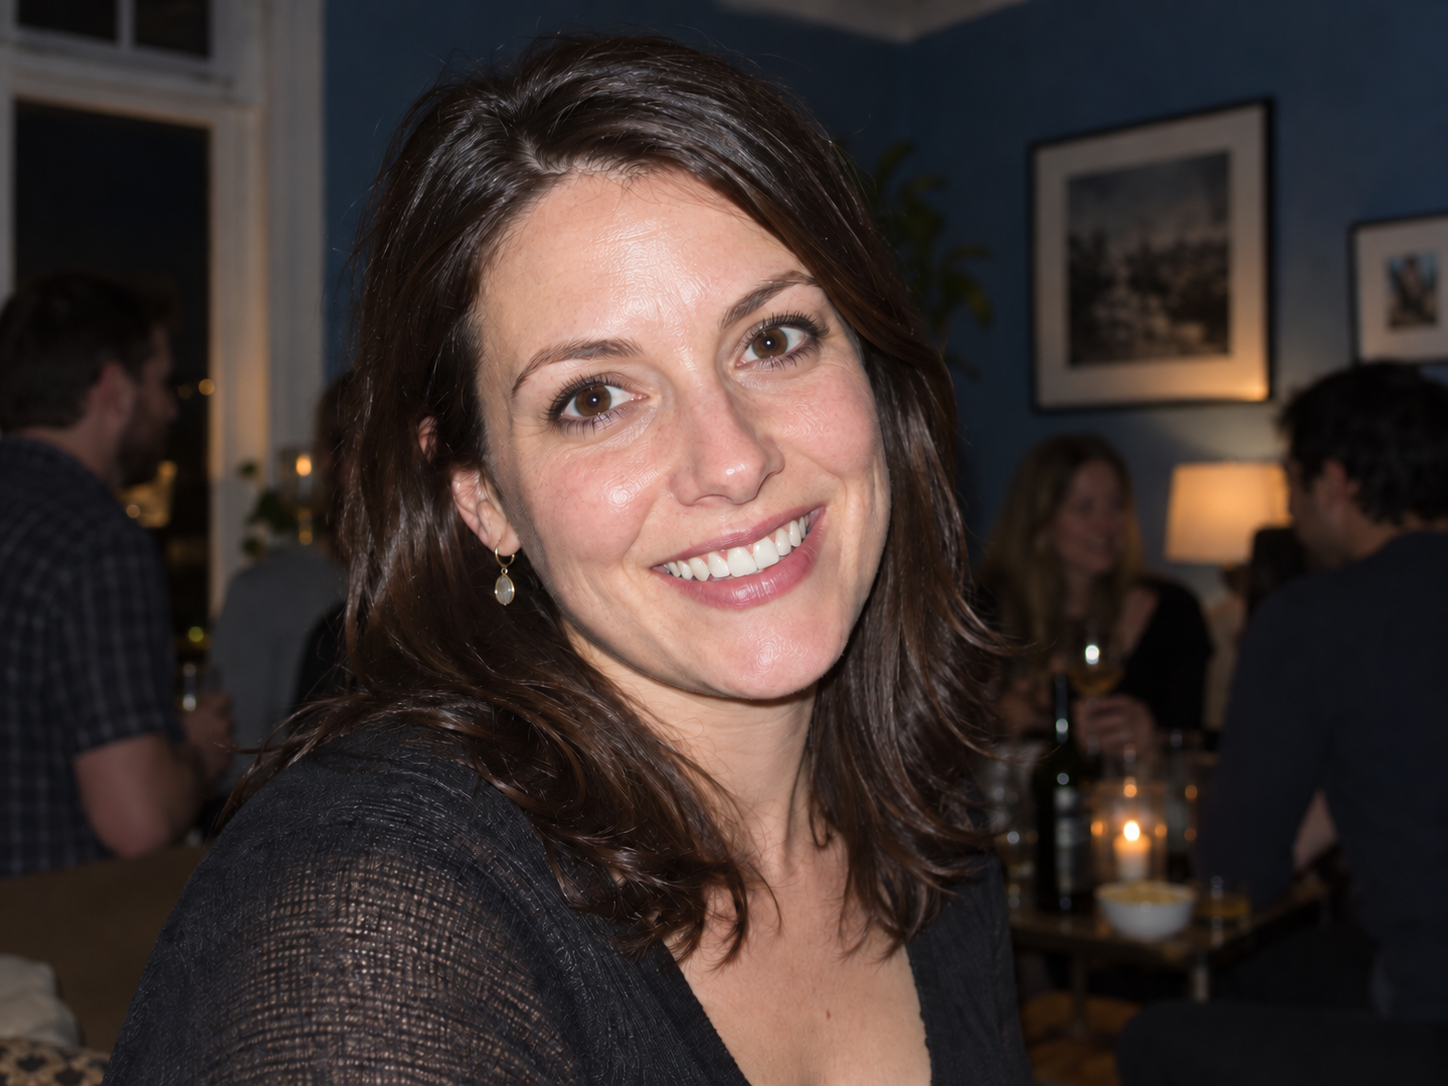
AI-generated correction illustration, edited from the source above. It demonstrates the intended scope, not a guaranteed product result.
Where ClearCrowds fits
This is a red-eye tutorial, not an announcement of a dedicated ClearCrowds red-eye tool. Use targeted red-eye correction first. If the same portrait also needs unrelated cleanup, the existing blemish remover and image brightness controls cover different tasks. Keep those adjustments separate so you can judge each change.
Do not use whole-image color removal to remove red from eyes: that operation makes matching pixels transparent across the image. Similarly, color inversion creates a negative effect rather than fixing red-eye.
Edit your own photos or images you have permission to modify. Preserve the subject’s identity and expression.
Frequently Asked Questions
Should I make the whole eye darker?
No. Restrict the correction to the affected pupil. Darkening the entire eye can obscure the iris and make the portrait look unnatural.
Can a black brush fix red-eye?
A brush can cover the red area, but a uniform black mark can also erase catchlights and edge detail. Prefer a targeted correction and inspect its boundary closely.
Should I remove the little white dots too?
Usually those highlights help the eye look natural. Compare with the original and avoid deleting them simply because they are bright.
Will reducing red saturation across the photo help?
It may reduce the visible red, but it also changes other red areas. That is a global color adjustment, not a pupil-only correction.
Summary
Target the red reflection, keep the original eye structure and inspect the result at both close-up and normal size. A successful correction is a small, controlled change—not a new pair of eyes.