How to Change a Wrong Price in a Product Photo Without Reshooting
Direct answer
You can change a wrong price in a product photo without reshooting when the edit corrects your own listing, sale sign, shelf tag, or product card and does not mislead the buyer. The safest workflow is to remove the old price first, rebuild the background, then add the new number only after the label or surface looks clean.
Do not use a price edit to hide extra fees, fake a discount, change regulated packaging, alter an invoice, or misrepresent what the customer will pay. If the price affects a real purchase decision, the edited image must match the checkout page and product description.
For a broader number-editing overview, read Edit Number in Photo Online. If your immediate job is a product card, sign, or label with the wrong digits, start with Replace Number.
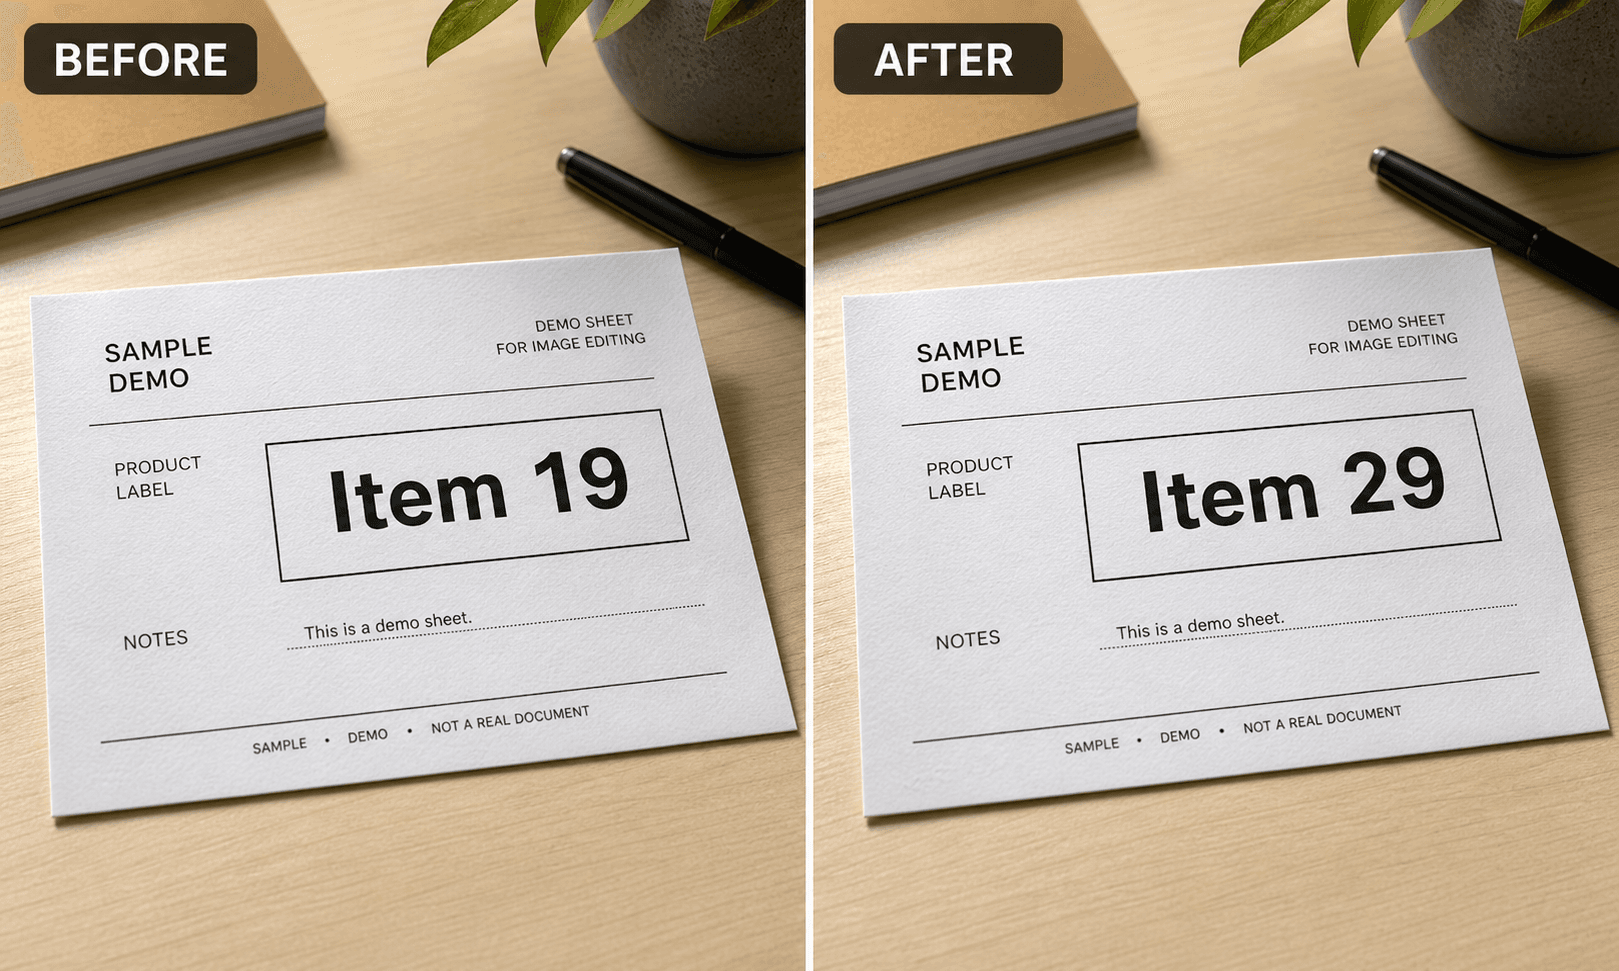
Try this task in ClearCrowds
Fix a price number carefully
Upload the product photo, remove the old digits, and rebuild the label before adding the corrected price.
- Small edits
- Label texture preserved
- Seller-safe workflow
The common case is simple: a seller already has a good product photo, but the visible price is wrong.
Maybe the sale changed from 19 to 29. Maybe a marketplace listing uses an old promotional tag. Maybe a printed shelf card has the wrong date, bundle count, or discount value. Rebuilding the whole scene, finding the product again, matching the lighting, and taking a new photo can take longer than the correction itself.
That does not mean you should type a new price directly on top of the old one. If the old digits are still visible underneath, the result looks fake. If the label texture disappears, the edit draws attention to itself. The job is not just changing the number. The job is making the product photo still feel like a real photo.

When a price edit is reasonable
A price correction is usually reasonable when all of these are true:
- You own the product photo or have permission to edit it.
- The new price matches the real listing, checkout page, or sales material.
- The edit only changes temporary display text, not the product itself.
- The original photo is otherwise accurate.
- The edited image will not hide fees, conditions, defects, or required disclosures.
Use the same rule you would use for a physical sign in a store. If you would be comfortable replacing the printed tag before photographing the product, an image edit is usually fine. If the change would make a buyer misunderstand the offer, reshoot or update the listing copy instead.
When you should not change the price in the image
Do not edit prices in photos when the number is part of a record or regulated material:
- Receipts, invoices, tax documents, refund records, bank statements, or insurance documents.
- Nutrition labels, medicine packaging, compliance labels, safety warnings, or legal disclosures.
- Marketplace proof screenshots where the old price is part of the transaction history.
- Product defects, missing accessories, used-condition notes, or shipping terms.
For private records, remove or blur sensitive information instead of changing the value. For product listings, keep the image aligned with the actual offer.
A safe workflow for changing the price
Use this sequence:
- Start with the highest-quality original photo.
- Crop and straighten the image before editing numbers.
- Select only the old price digits and a small amount of nearby background.
- Remove the old digits and rebuild the label or surface.
- Zoom in and check whether paper texture, shadows, and edges still look natural.
- Add the corrected price after the background looks clean.
- Match the size, weight, color, spacing, and angle of nearby text.
- Compare the edited photo with the product listing and checkout price.
Small selections matter. If you select the whole label, the editor may rebuild useful details such as product names, borders, folds, or shadows. Fix the digits first, then adjust the final number separately.
AI cleanup vs typing over the old price
Typing a new number over the old price is fast, but it often leaves clues:
| Method | Good for | Risk |
|---|---|---|
| Typing over old digits | Rough draft, internal mockup | Old number may show through |
| Cropping out the price | Photos where the price is not needed | Can weaken the product context |
| Blurring the price | Privacy or old catalog photos | Looks intentional and may reduce trust |
| AI cleanup first | Product labels, shelf tags, cards, paper signs | Needs review for texture and alignment |
| Reshooting | Regulated, high-value, or legally sensitive products | Takes more time but is safest |
For ecommerce photos, AI cleanup first is usually the best balance. Remove the old digits, check the surface, then add the corrected number only if it is honest and necessary.
Prompt examples
Use a focused instruction:
Remove the old price digits from the product label and keep the paper texture, border, lighting, and surrounding text unchanged.
Then add the corrected price in a separate step if the editor supports text placement.
Avoid broad prompts like:
Make this product photo look better.
That may change parts of the product, packaging, or label that should stay stable.
Review the price edit before you post it
Before publishing the image, check:
- Does the new price match the product page and checkout price?
- Are the old digits fully gone?
- Does the label texture still look like paper, plastic, metal, or fabric?
- Are shadows and perspective consistent?
- Is the new number aligned with nearby text?
- Did the edit accidentally change the product name, size, quantity, or condition?
- Would a buyer understand the same offer from the image and the listing text?
If any answer is uncertain, use the unedited image, crop the price, or reshoot.
How this fits with ClearCrowds
ClearCrowds is useful when the hard part is cleaning the old number without damaging the photo. Start with Replace Number for a corrected price, or use Remove Text when the old price should simply disappear.
If the issue is a sticker, tag, or small object on the product photo, the object removal guide is the better starting point. For general storefront and marketplace cleanup, see AI ecommerce photo editing.
Frequently asked questions
Can I change a price in a product photo online?
Yes, if the edited price matches the real offer and you own or are allowed to edit the image. Remove the old digits first, then add the corrected price after the surface looks clean.
Is it okay to edit a sale price in a marketplace listing?
Only if the price is the current real sale price and the marketplace rules allow edited product images. Do not use image edits to fake discounts or hide checkout terms.
What if the price is on a curved package?
Curved packaging is harder because the new digits must follow perspective, glare, and shadows. Keep the edit small and compare it with nearby text. If the package is regulated or high value, reshoot instead.
Should I blur the old price instead?
Blur works when you only need to hide information. It is not ideal when the image must show a corrected price because a blurred label can look unfinished or suspicious.
Can AI replace the number automatically?
AI can help remove the old digits and rebuild the background. The replacement still needs human review for font, spacing, angle, color, and honesty.
Summary
Changing a wrong price in a product photo is safest when you treat it as a correction, not a shortcut. Remove the old digits first, preserve the label or background, add the new number carefully, and make sure the final image matches the real offer.